Categories
OpenShift Red Hat

Adjusting OCP worker node resources

Let’s say that you deployed your OpenShift cluster with all the defaults using the installer provisioned infrastructure method. Not only that but you’ve got your some workloads already deployed but you want to adjust all the resources available to the underlying worker node VMs. How do you do that? I will detail those steps in this article!

You will need to figure out what the minimal worker node count that is needed to run your workloads. In this example we will use one but this will work if you have more. You could simply increase the replica count after adjusting the machineset instead.

First we will need to get the name of the machineset we will be altering.

oc get machinesets -n openshift-machine-api

Then we will scale the worker nodes to one replica in this example using the machineset name from the above command (ocp4-tkqrm-worker).

oc scale --replicas=1 ocp4-tkqrm-worker -n openshift-machine-api

Now let’s get the name of the worker node(s) that is/are left. We will use this later to delete those machines after we have edited our resources and scaled our cluster back up. Make sure to take the name of them down or run in a separate terminal to reference later when we remove them.

oc get nodes

Now let’s edit our machineset resources to whatever we like using the following command.

oc edit machineset ocp4-tkqrm-worker -n openshift-machine-api

Once you have edited the machineset we need to scale it back up. This will deploy all new worker nodes with the newly adjusted resource requirements. Note left over worker node resources will not change and this is why we need to delete them later in the tutorial.

oc scale --replicas=3 ocp4-tkqrm-worker -n openshift-machine-api

Once the new machines are deployed and operational displaying the ready status using the oc get nodes command; we can delete the older worker nodes.

oc delete machine ocp4-tkqrm-worker-dzrvt -n openshift-machine-api

Note the above command will take a while to run while it drains the node of any pods that are running. Once the command completes, your cluster should have all new worker nodes with the newly specified resources!

-Mike
Categories
OpenShift Red Hat Virtualization

Custom OpenShift VMWare IPI Deployments

In the past few posts I have written how to do some basic setup tasks once you have a OpenShift deployment up and running. I figured I should backpedal a little here and discuss how to do a custom OpenShift deployment on VMWare using the IPI deployment method.

To start when you do a basic deployment of OpenShift with the openshift-install binary you get a basic cluster with 3x supervisor nodes and 3x worker nodes. While this is great for folks interested in just getting to know OpenShift, if you are deploying production workloads you may want to increase the supervisor/worker node counts.

By default the 3x worker nodes are deployed 2x CPU counts with a single core on each socket, 8GB of RAM, and 120GB hard drive. Well if you wanted to increase these default values, you are in luck; I will detail that process below!

First we need to create a directory to hold our custom install-config.yml and installation files for our cluster.

mkdir install-dir

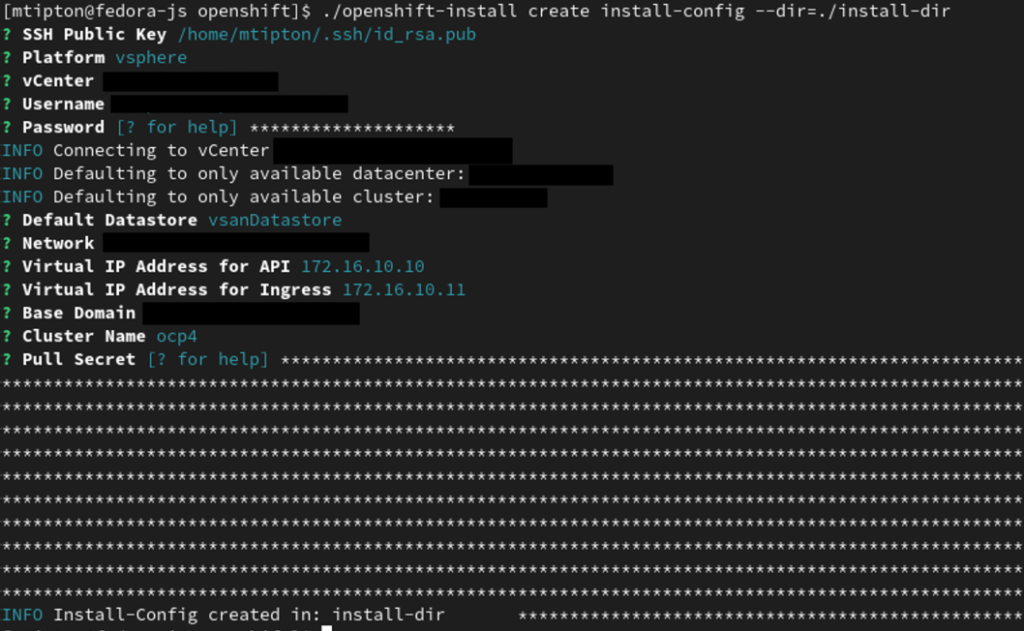
Next we want to create our custom install-config.yml used to spin up our custom OpenShift cluster deployment. We can do this using the openshift-install cli tool by running the following command and filling in all the necessary information about our VMWare cluster and our OpenShift cluster we are deploying.

openshift-install create install-config --dir=./install-dir

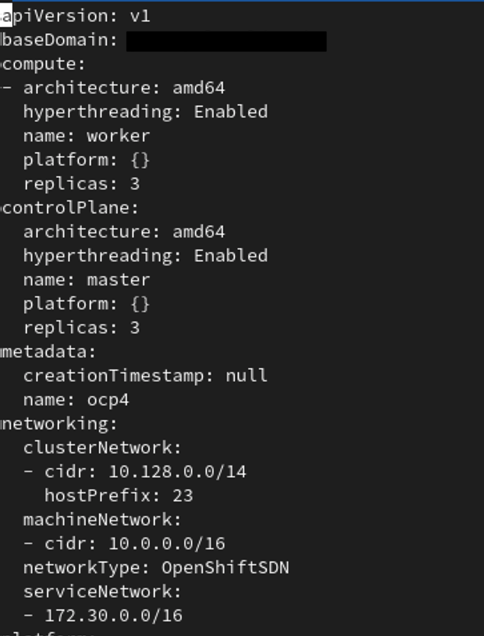
Next we need to edit the newly created install-config.yml in the installation directory we created. It will look like the snippet below in the screenshot. Notice the platform variable is set to {}, we will need to edit this to have the proper amount of resources we want to give our OpenShift cluster VMs.

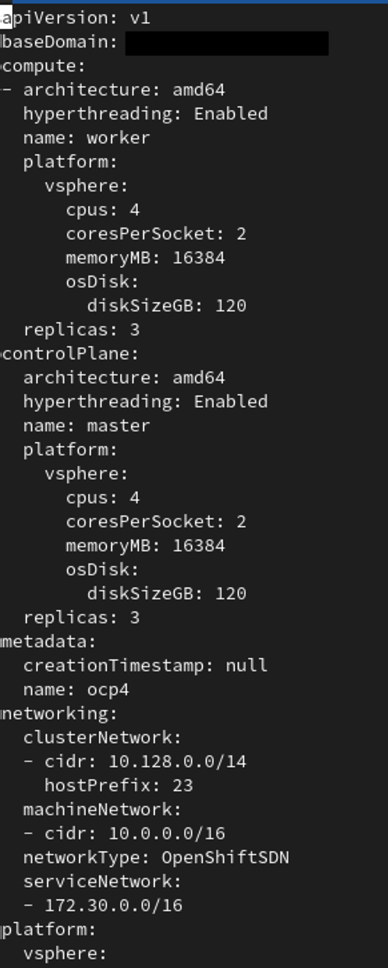
To do this all we need to do is remove the {} and add some new variables to our yaml file to specify the platform (vsphere in this example), cpus, coresPerSocket, memoryMB, and diskSizeGB. Below you will see an example of deploying supervisor and worker nodes with 3 replicas each with 4 CPUs, 2 cores per socket, 16GB of RAM, and 120GB hard drives.

After you have edited the install-config.yml just go ahead and write the file and now we can run the create cluster command to deploy our custom configured OpenShift install.

openshift-install create cluster --dir=./install-dir

Enjoy your newly customized OpenShift cluster!

-Mike